Structuring your first Haskell project with Stack
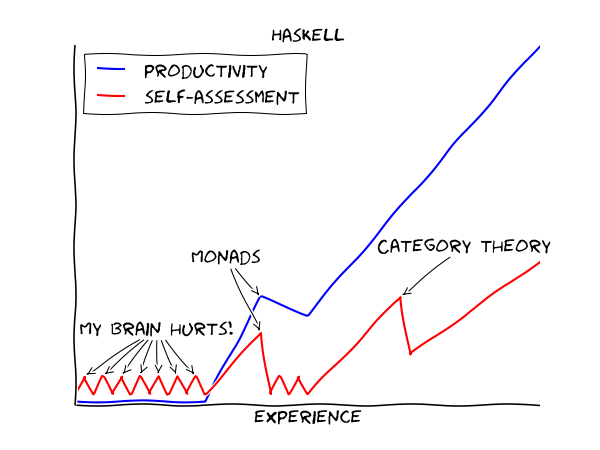
Haskell is a tricky language to begin with, with a learning curve somewhat like this:
There are dozens of really great Haskell tutorials, which teach functional thinking, haskell syntax, type theory. I repeat, they’re great. And you can spend hours playing with functional concepts, types et cetera, even when you’ve gone through only a small subset of the language.
If you read such blogs, you would have been told that ghci is your best friend. This article will attempt to change that.
The Haskell build system
This article assumes you are already familiar with using GHCi interpreter, and can run simple programs well enough using ghci, or even runhaskell command. Haskell’s compiler (not interpreter) is called GHC, which behaves somewhat similarly to GCC when compiling simple programs. Unlike ghci, it is a full fledged compiler, and can be used to build production ready software binaries. Once you know how to create haskell projects, the scope of your haskell programs will increase exponentially. It is also important to understand these concepts, in order to understand pre-existing haskell projects.
Basic compilation
As an example, save the following code into t.hs and run the command ghc t.hs
This will create a few files: [t t.hi t.o] apart from the original t.hs file. You do not need to worry about the .o and .hi files. You can run ./t to run your shiny new program. Type your name, and it will greet you.
You now ask, why can’t you just do runhaskell t.hs? It behaves similarly, and that’s what most people use for toy examples. It basically compiles and runs the program in a single command, and does not create any ugly .o or .hi files.
Build tools
Wait, now we need tools on top of the compiler?
Haskell’s build system provides a lot of functionality, and build tools standardize some of it. In C++ world, CMake can be considered a build tool, albeit it is quite free-form as well.
Haskell has two major build tools:
- cabal: Old and reliable workhorse. It is quite possible that every single post-2010 haskell project uses cabal.
- stack: New, fancier, and somewhat backwards compatible. Many haskell projects added stack support, thanks to functional / reproduceable builds, and better dependency management.
Stack was developed as a replacement for cabal, although it is almost completely backwards compatible. Both provide similar functionality, but stack was the first to add a clean non-system-level dependency management. Cabal has since added a similar functionality, but we will focus on stack in this article.
To install stack, you can refer to their website, which describes the following command (at the time of writing) for installation:
Creating your first stack project
Let us now create a fancy new project, which prints different messages depending on the time of the day. Navigate to a folder where you want to create your new project (do not create the folder for the project). Run:
This would take some time, the first time around. This is because stack is downloading its own version of GHC (so that it does not conflict with your system installations).
Once it is finished, you should see a new folder of the name my-cool-project. If you enter it, you may see the following folder structure.
.
├── app
│   └── Main.hs
├── ChangeLog.md
├── LICENSE
├── my-cool-project.cabal
├── package.yaml
├── README.md
├── Setup.hs
├── src
│   └── Lib.hs
├── stack.yaml
└── test
    └── Spec.hs
Haskell projects conventionally have project names comprising of one word, or two/three small words separated by hyphens.
File description
Let’s talk about these files one by one:
README.md: The main readme of your project. Make sure you put a nice description of your project in this file.
stack.yaml: Configuration for stack. Contains instructions about where to download dependencies from, what sort of versions to select etc.
package.yaml: Your project’s build configuration. It lists dependencies of your project, the binaries to build, the libraries to link, runtime commands, build commands etc. More on this in the section on dependencies. You should definitely edit this file’s initial few lines, since they describe your project, and you (its maintainer) in more detail.
my-cool-project.cabal: File generated from package.yaml by stack, for backwards compatibility. DO NOT EDIT THIS MANUALLY. Stack will ignore
package.yamland use this file, if you edit it manually. It is safe to delete this file, stack will regenerate it automatically.LICENSE: The license your project is available under. Remember to write your name inside thie file.
ChangeLog.md: An optional changelog that you can maintain for your project, to help users during version upgrades.
Setup.hs: This file can be ignored for now. It allows for very complex build configurations, although is not required in almost all cases.
app folder: This folder contains your
mainfunction, among other code from your project that will not be useful for people who may import your project as a library. This folder often contains a single file, which launches some function placed insidesrc, although you are free to put any Haskell code here and use it as it is.src folder: This folder often contains the major code of a project. See
src/Lib.hsfor an example file. The main function is present inapp/Main.hs, which calls thesomeFuncfunction insrc/Lib.hs.test folder: This folder contains tests for your code. More on this in the section on writing tests.
Running your test project
Before we do this, you should look at the files app/Main.hs and src/Lib.hs, if you haven’t already done so.
Also note, stack does not use anything from your system installation of haskell/ghc/cabal. Thus, we will build and run our program in a slightly different fashion than before.
cd my-cool-project
stack configure      # This has to be done only once
stack build
stack exec my-cool-project-exe
Note that my-cool-project-exe is the name of your project’s executable, which stack will run in the correct environment, where all the configured dependencies etc are available. You can modify some of the code (go do it!), run stack build and then stack exec my-cool-project-exe to re-run it.
Quick note: If your project requires CLI arguments to run, you can pass them in this manner: stack exec my-cool-project-exe -- arg1 arg2 arg3 .... The arguments before -- are interpreted by stack, and the ones after it are passed directly to your binary’s environment.
Structuring your code
Now that the basics are out of the way, let us look at how to structure Haskell project source code.
Modules
You write your code in files whose names start with capital letters. Each of these files is called a module. If you have a file src/MyFile.hs, it must look (in the simplest case) like:
module MyFile where

import Data.Text
import qualified Control.Monad as M

fancyFxn :: String -> Bool
fancyFxn _ = False
Note that the file name and the module name match exactly, except for the .hs. If they do not match, your code won’t build.
Modules are a neat way to organize your code. You can keep related functionality in a single module, which makes it easy to search for functionality around your code.
You can import fancyFxn in any other file of your project (or any project which depends on your code) by importing it as:
import MyFile                -- Import all exported items in this module
                             -- or
import MyFile (fancyFxn)     -- Only import fancyFxn
                             -- or
import qualified MyFile as M -- Imports fancyFxn as M.fancyFxn and so on
Nested Modules
What if you want a deeper nesting level? Or, have you wondered how they made a module of the name Data.Text?
Let’s say you want a module named MyLib.MyFancyLogic. You need to create a file src/MyLib/MyFancyLogic.hs with the following as its first line:
This can be imported in any file using import MyLib.MyFancyLogic and its variants.
Exports
The above is all well and good, until you start running into frequent name conflicts. In the format shown above, all modules export all the functions and types defined in them. This is not just annoying, but it also prevents the compiler from optimizing things further. This is because more optimizations are possible while compiling the module, if the compiler knows which functions will not be used in any other external context.
Let’s see some exports examples:
module MyExports ( SomeTypeWithoutItsFxns
                 , SomeOtherType(..)
                 , something
                 , module MyMinorExports
                 , MyMajorExports.SomeType(..)
                 , MyMinorExports.fxnToHandleType
                 ) where

import MyMinorExports
import MyMajorExports

data SomeTypeWithoutItsFxns = SomeTypeWithoutItsFxns { unexportedMember1 :: Int
                                                     , unexportedMember2 :: Bool
                                                     }

data SomeOtherType = SomeOtherType { member1 :: Int
                                   , member2 :: Bool
                                   }

something :: Int -> Bool -> SomeTypeWithoutItsFxns
something i b = SomeTypeWithoutItsFxns { unexportedMember1 = i
                                       , unexportedMember2 = b
                                       }
The items in the bracket (before the where) are the exports. Let’s analyze each one of them one by one:
SomeTypeWithoutItsFxns
Notice the definition of SomeTypeWithoutItsFxns. Exporting this will allow other modules to use this type in their type signatures. But remember, the data constructor SomeTypeWithoutItsFxns will not be available for use. In addition, unexportedMember1 and unexportedMember2 will also not be available. They are called accessor functions, see below.
SomeOtherType(..)
As opposed to the above description, exporting a type/data constructor in this manner will allow using its data constructor, as well as its accessor functions. They allow you to do things like:
f :: SomeOtherType -> Int
f myObj = member1 myObj   -- Not the best code, but shows what member1 does.
This is somewhat like myObj.member1 if you are coming from an object oriented background.
something
This will export whatever is defined as something in this module. It can be a plain value or a function (they’re technically the same :smile:).
module MyMinorExports
Writing this in your exports will export everything exported by MyMinorExports. That means, if MyMinorExports exports myVal, everyone who imports MyExports can also access myVal.
MyMajorExports.SomeType(..)
If MyMajorExports exports a type SomeType with its accessor functions, these will all be exported to modules which import MyExports.
MyMinorExports.fxnToHandleType
This is very similar to the export of someFxn, but in this case this function is exported from another module.
MORE SECTIONS INCOMING
Libraries, tests, and dependency management
The haskell language has a very small set of built in functionality. Most other functionality is imported from modules made available through dependencies (external packages). Stack handles that for you very neatly, but it still requires a small amount of effort.
Stackage / Hackage
First, let’s see how to find functionality which has already been implemented. Let’s say we want to generate a random integer. Go to stackage.org (or hackage.org), and search for random in the search box. The first link says package random. A package is a haskell library / project, which can be used as a dependency. Note the URL of the page after clicking on this link. It should look like: https://www.stackage.org/lts-11.3/package/random-1.1. Here, random is the name of the package, and 1.1 is the version whose documentation is shown here.
Before we move on to importing this package, let’s take a quick look at a nifty feature of Stackage. Let’s say you have a computation in the STM monad (no need to know what it is), and you want to convert it to a computation in the IO monad. A quick though reveals that there should be some function of the type STM a -> IO a. Put this query in the search box of stackage (main page), and it will show something like this:
Pretty cool!
Dependencies
Adding a package as a dependency is very easy. You just go to package.yaml, and add a new line in the dependencies section. An example of that section is:
After this, you need to run stack build, and it will automagically download the required dependencies with appropriate versions.
Writing tests
Here is a test I wrote for a project of mine, for example. You need the hspec package to write tests in this format. Tests can be run using stack test. Describing the syntax of hspec is out of the scope of this article, so I urge you to visit the documentation / examples on hspec’s website and play with it.